Agricultural Literacy Curriculum Matrix
Agricultural Literacy Curriculum Matrix
Lesson Plan
The Rotten Truth
Grade Level
Purpose
Students observe and explain the decomposition process and identify the methods and ingredients for making compost. Grades 3-5
Estimated Time
Materials Needed
Activity 1: Decay and Decomposition
- 1-quart Ziploc bags, 1 or 2 per student pair
- Masking tape
- Decay Buffet: fruit and vegetable peelings, leaves, small twigs, plastic bag, paper bags, hay, straw, grass, plastic utensils, paper cups, drinking straws, paper napkins, etc. (Caution: no meat or dairy)
- Scissors
- Soil, 1/2 to 1 cup per student pair
- Spray bottles or bowls of water
- Gloves (food handlers gloves will work)
Activity 2: Containers and Layers for Composting
- Compost Containers handout
- My Compost Pile activity sheet, 1 per student
- Dirt: Secrets of the Soil
Elaborate
Vocabulary
biodegradable: capable of being broken down through the actions of living organisms and natural processes over time
compost: a mixture made of decaying organic material used to fertilize plants and amend soils
decomposer: an organism that feeds on and breaks down dead plant or animal matter
decomposition: the process of breaking down or being broken down into simpler parts or substances especially by the action of living things (as bacteria or fungi)
nutrient: a substance that provides nourishment essential for growth and the maintenance of life
soil amendment: a material added to the soil to improve its physical, chemical, and/or biological properties
Background Agricultural Connections
Decomposition is a fundamental process in which all life depends. We’d all be knee deep in garbage without it! Bacteria, fungi, and other microscopic organisms that live in the soil, air, and water are responsible for turning once-living plants and animals into nutrients that can be used again and again. Think of these organisms as nature’s recyclers. They have the ability to produce special enzymes that allow them to break down dead plants and animals and use them as food. No job is too big; they quickly enlist the help of friends and family. As they eat, many microorganisms grow and multiply at an amazing rate—in just four hours, one bacterium can grow to a colony of 5,096. At day’s end, there are millions and billions of them working together. Why, in a teaspoon of soil, there are more bacteria and fungi than all the people on Earth! Despite their microscopic size, you’ve probably seen evidence of them right in your own home. Remember that orange and blue-green mold in the back of the refrigerator? Or that black or white fuzzy slice of bread? These are colonies of our microbial friends hard at work practicing the fine art of decomposition.
Composting takes advantage of microbial decomposition to turn farm, garden, and kitchen wastes into a nutrient-rich soil amendment. Some dairy and poultry farmers compost the manure from their animals and sell it, turning waste into profits. Many gardeners throw kitchen scraps and weeds into the compost, turning waste into fertilizer for next year’s garden. Adding compost to the soil provides nutrients to plants, improves soil structure, and increases the water-holding capacity of the soil.
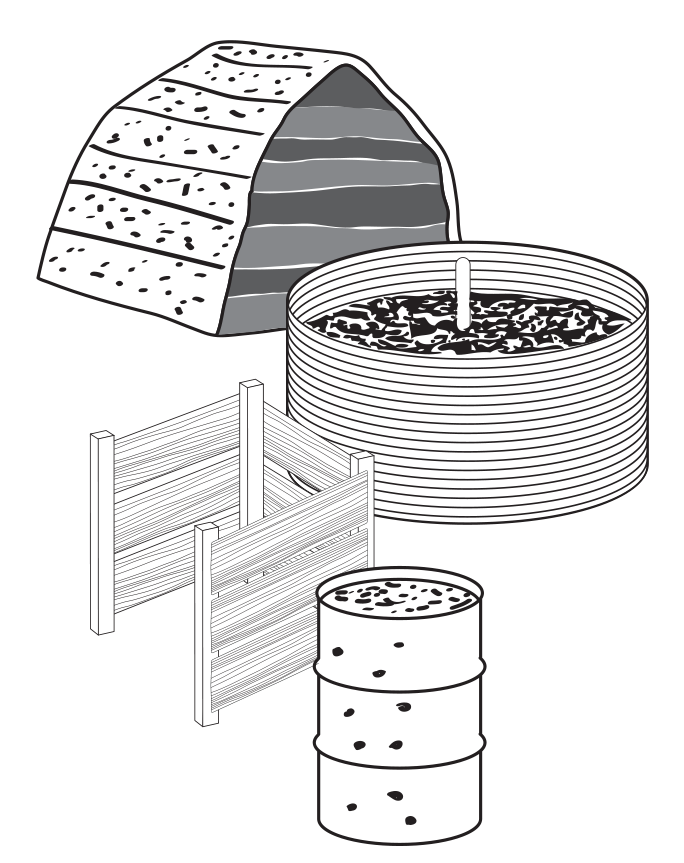 Many types of containers are suitable for making compost—they just need to be accessible, resist decay, and allow air flow. How do you decide which container will work best? Consider the amount of time and space you have, and the quantity of materials you will be composting. Most compost containers fall into one of these categories: heaps (simple, stacked piles), hoops (caged enclosures), bins (boxed enclosures), and barrels (drum enclosures). For fast, hot compost, the ideal pile size is 1 cubic yard (3' x 3' x 3'). This volume effectively retains the heat generated by the bacteria. The volume of a single pile should not exceed 2 cubic yards in order to maintain proper ventilation of the pile. If space is a limiting factor, the pile sides can be insulated to maintain high temperatures in a smaller volume. Compost temperatures of 135–160°F speed decomposition and kill pathogenic organisms, flies, and weed seeds. In a well-built compost pile with proper ventilation and moisture, the activity of decomposers will provide this heat without any problem.
Once you have selected the container and location for your compost pile, remember the simple formula: 1 part green (fresh grass clippings, kitchen scraps, etc.) to 2 parts brown (straw, aged manure, dry leaves, etc.). Please note that no meat or dairy items should be included because they can potentially introduce harmful bacteria that will not only stink, but that also have the potential to make people sick. Layering helps the pile to get going, but stirring the pile is important and will accelerate the decomposition of your dead plants and scraps into beautiful, earthy smelling (not stinking) compost.
Engage
 Introduce the vocabulary words to the students. Assess their prior knowledge by asking a series of questions such as:
- What is compost? Does anyone have a compost pile at home?
- What is a decomposer?
- What does the word biodegradable mean? (Find examples of everyday products at home or around your classroom that are labeled as "biodegradable" or "non biodegradable." Ask students to identify the difference between the two classifications.)
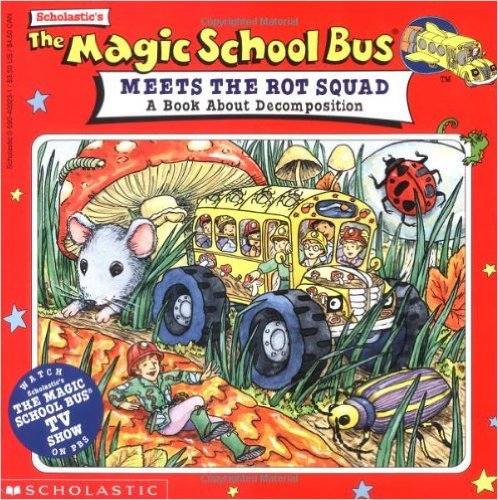
- As a class, read the book Magic School Bus Meets the Rot Squad by Joanna Cole. You may also watch the movie.
Explore and Explain
Activity 1: Decay and Decomposition
- Divide the class into pairs. Give each pair a quart-sized Ziploc. Ask them to write their names on a piece of masking tape and stick it on the bag.
- Set up a “Decay Buffet” of items like those noted in the list of materials.
- Instruct students to place one small piece of each item from the Decay Buffet into their bags. If necessary, have them cut or break the items into small pieces that will fit into the bags. Stress that they not add any meat or dairy to their bags because potentially harmful bacteria could grow.
- Ask one student to place the items in the bag and the other student to record the exact contents. The recorder should also note predictions about what will happen to each item over time. Will the item rot? Smell yucky? Remain the same? You may want to have students switch roles and create a second compost bag with a list of contents and predictions.
- Next, ask students to add about 1/2 cup of soil to their bags and to lightly mist the contents with a plant mister (adding a teaspoon of water and mixing the contents will work the same way).
- Have the students blow into the bags to inflate them slightly and carefully seal them. Once the bags are sealed, leave them for 2–8 weeks. You may decide to keep the bags together or place them in various locations with differing conditions (light, temperature, etc.).
- Note: If students choose their compost bag’s location, ask everyone to register their locations on a master list, or you may be unpleasantly surprised when a missing bag finally makes its presence known.
- Have students create compost bag journals. Ask them to observe their bags periodically and record what they see happening inside. Remind students that they are not to open the bags until the designated date.
- On the designated date, have the students take their bags outside. Distribute plastic gloves to the students to wear while sorting through the contents of their bags with their partners. Caution: Students with known allergies to fungus and fungal spores should not participate.
- Record any items still identifiable and in their present state. Provide spray bottles or water bowls so items can be cleaned off for closer observation and identification. Have students compare their findings to the original list of items and note anything that is missing.
- How did the results compare with the predictions? Did location of the bags make a difference? Define and discuss the process of decomposition.
Activity 2: Containers and Layers for Composting
- Provide each student with a My Compost Pile activity sheet.
- Using the video Dirt: Secrets of the Soil and the Background information, review the methods for making a compost pile.
- Use the Compost Containers handout to discuss different types of containers for composting.
- Optional: Create your own school compost pile.
- Discuss the following questions: Think of some things you’ve thrown away recently. What happens to these things? Do they disappear? Decompose? Remain unchanged?
- What effect do you think light and temperature have on decomposition? Can you think of any other suitable types of compost containers?
Elaborate
-
Use the Make Your Own Worm Bin instructions to create a classroom vermicomposting bin out of a recycled styrofoam cooler. Prepare the cooler ahead of time, and then have students add the bedding, worms, and vegetable scraps. Vermicomposting in your classroom is an effective way to engage students with a wide variety of science concepts. For more information about using the worm bin to investigate ecosystems, life and nutrient cycles, and decomposition, see the lesson Vermicomposting (Grades 3-5).
Evaluate
After conducting these activities, review and summarize the following key concepts:
- We rely on soil to grow the food we eat.
- Soil must have nutrients to grow healthy plants. One method of supplying the soil with nutrients is through composting organic matter.
- Compost is decomposed organic matter such as plant and animal waste that can be added to soil for nutrients.
Recommended Companion Resources
- A Handful of Dirt
- AgBadging Field Guide
- Compost Stew
- Compost by Gosh!
- Composting: Nature's Recyclers
- Construct a Compost Bottle
- Dirt: Secrets in the Soil (DVD)
- Dirt: The Scoop on Soil
- EIEIO: How Old MacDonald Got His Farm
- Epic Pumpkin Collapse Timelapse
- Leaf Litter Critters
- Make Your Own Worm Bin
- Rotten Pumpkin: A Rotten Tale in 15 Voices
- Soil Health Education Resources
- Soil! Get the Inside Scoop
- Soil, Not Dirt
- Sophie's Squash
- The Magic School Bus Meets the Rot Squad: A Book About Decomposition
- The Soil in Jackie's Garden
Author
Organization
 |
We welcome your feedback! If you have a question about this lesson or would like to report a broken link, please send us an email. If you have used this lesson and are willing to share your experience, we will provide you with a coupon code for 10% off your next purchase at AgClassroomStore. |